Homemade Organic Liquid Fertilizer
Fertilizer is an important weapon in the arsenal of the home vegetable gardener and one which is often overlooked and in particular, homemade organic liquid fertilizer.
To begin with we would always advise starting off with well fertilized soil prior to planting your vegetables and this can be achieved with the use of various animal manures or by using what is referred to as green manure but these are processes we cover in another article HERE.
We’re going to look at liquid fertilizers, specifically homemade organic liquid fertilizers (a more general overview of fertilizer is HERE). These are a very useful tool to have in your possession as once you have an established crop, it becomes increasingly difficult to use solid fertilizer and the liquid versions can be applied very easily without damaging your plants, so knowing how to make organic liquid fertilizer is definitely beneficial to your plants.
There are a number of key benefits to making your own liquid fertilizer;
It can be substantially cheaper than buying manufactured products as you should be able to source your base materials for either free or very cheaply. Where I live I can just walk into the field next to the house and fill a bag.
You know exactly what you’re putting on your plants and as the plan is to eat what we grow, it’s always nice to know there are no weird or wonderful inorganic ingredients in there.
It’s just generally better from an ecological point of view. You eliminate all of the manufacturing, packaging and transportation processes. Plus at the end you can compost all your bi-products meaning the process produces no actual waste.
So, how do we make homemade liquid fertilizer? Well there are two methods that we use;
Fertilizer Teas (animal manure based or plant based)
Seaweed Concentrates (tonics)
Personally, I consider seaweed concentrates as just another form of fertilizer tea but some people like to distinguish between the two so we’ll look at them separately.
Fertilizer “Teas”
Now you definitely don’t want to go getting yourself confused and switching your morning cup of Earl Grey for one of these ‘teas’ as that would be an unpleasant start to the day. However, your plants are going to love this stuff.
We call these ‘teas’ because the process is exactly the same as making a cup of tea, only in a larger and far less pleasant way.
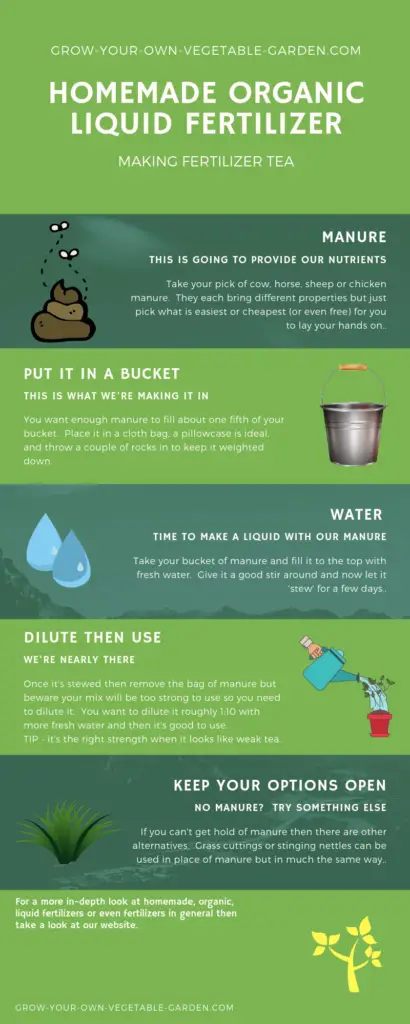
We want to take a large bucket and a cloth sack of some description – I use an old 5 gallon brewing bucket and an old pillow case but you just need to use whatever you have on hand and suits your needs. The pillow case is then filled with the chosen base material for the fertilizer (along with a couple of rocks to ensure it stays a bit weighted down) and placed in the bucket, which is then topped up with fresh water – the ratio of material to water is dictated by what you’re using. This is then given a good stir and allowed to stew for about three days, stirring when possible, before we then remove the sack and allow it to drain off into the bucket before placing the contents into your compost.
You now have a big bucket of homemade, organic, liquid fertilizer but it’s far too strong to put straight on your plants so it will need diluting down first at a ratio of about 1 part fertilizer to 10 parts fresh water.
Manure Fertilizer Tea;
As the name suggests, this is a fertilizer tea made with animal manure and you can use any of the following quite successfully;
Cow Manure
Horse Manure
Chicken Manure
Sheep Manure
Chicken manure can be a little strong so you have to take care to properly dilute your liquids. Sheep manure is my favourite because it probably contains the best balance of nutrients, it’s form makes it quite easy to handle and (I’m probably a little biased because of this one) I live next to a sheep farmers fields so can collect as much of it as I want. That being said, they all work well so just select the one that is most convenient for you.
You want to use them all in the same way as described above with a ratio of roughly 1 part manure to 5 parts water, left to stew for about three days and then remove the manure and place into your compost pile.
The remaining liquid needs to be diluted at a ratio of roughly 1 part fertilizer liquid to 10 parts fresh water (collected rain water is best) but the easiest way to judge if it’s the right strength is to just look at it. You want it to have the appearance of a weak tea.
Now just use this to water your plants.
Plant Based Fertilizer Tea
As the name suggests, this is a fertilizer tea made from plant based material, namely grass clippings or stinging nettles.
The process is exactly the same as above but using the following ratio;
Nettles – 1 part nettles to 5 parts fresh water.
Grass Cuttings – 1 part grass cuttings to 3 parts fresh water.
Let the mix stew for three days. You will find plenty of advice on line stating that you should leave these mixtures for weeks on end but there has been research conducted into how fast the nutrients leach into the water and the results indicate that the bulk of the nutrients have leached after three days. This means leaving them any longer is not particularly effective.
As with the animal manure, remove the solid matter (what’s left of it) after the three days and compost it.
You now need to dilute the remaining liquid at a ratio of about 1 part liquid fertilizer to 10 parts fresh water.
Now water your plants with it.
Seaweed Concentrate
We always use a mix of a seaweed concentrate when planting seedlings and/or transplanting plants. This is because the mix is excellent at minimising transplant shock that occurs when plant roots are disturbed. Some plants are more susceptible to this than others. We have trialled seaweed concentrate on a range of plants with great results.
Seaweed concentrates are not strictly a fertilizer, and might be better referred to as a “tonic”. There are quite a few commercial brands around, but the science that applies to them all is the same. Basically, the chemical make-up of the solution that is produced from seaweed, stimulates the strengthening of plant cell walls and also cell division.
But we’re not interested in the commercial brands here in this article and want to make our own, homemade, organic versions.
So the first stumbling block here is if you live in a landlocked area then you’re going to struggle to collect seaweed!
For those of you who can collect seaweed then first of all you need to make sure it’s legal to do so in your area.
Once you’ve collected your seaweed then take it home and give it a good rinse off with fresh water to wash away any salt residue.
Now you need to make your seaweed tonic just as you would make a manure or plant fertilizer tea but with a few alterations to rates and timing.
Place your seaweed teabag into your bucket and fill with water at a ratio of 1 part seaweed to 3 parts water.
Give it a good stir and leave to stew for at least a few weeks as due to the nature of seaweed, it’s going to take longer for it to break down and leach enough nutrients into the water.
Now discard the solids as usual and compost them.
Now dilute your mixture roughly 1 part liquid fertilizer to 1 part fresh water and it’s ready to water your plants with.
In Summary
You can make your own homemade organic liquid fertilizer with very little effort and be happy in the knowledge that you know exactly what’s in it.
It’s very cheap to do and can even be completely free, providing you with more than enough liquid fertilizer for your vegetable garden.
Don’t underestimate how smelly this stuff can be but the satisfaction of making your own makes it more than worth while.