Are you ready to take on the challenge of growing your own hot chili peppers?
The world of hot chili peppers is exciting. New fiery crossbreeds enter the market every year. With hundreds of varieties being grown all over the world, you’ll have fun finding a variety that you’ll enjoy growing and harvesting in your own garden.
Thanks to the team at Sonoran Spice, who sell the world’s hottest chili peppers seeds including Carolina Reapers, Trinidad Scorpions, and Ghost Peppers, here are some pointers to get you started in growing your own hot chili peppers at home.
To get started, you’ll need a seedling tray or small pots filled with free-draining, seed-starting potting mix, a heating propagator (or a Ziploc bag), and something to label the pots. Rockwool cubes, which are very inexpensive and can be found online, also make a great growing medium.
If you’re growing multiple varieties at once, be sure to label your pots.
Plant the seeds about ¼ inch into the soil and make sure to keep the soil moist and warm at a consistent temperature above 78 degrees Fahrenheit. Heating propagators can help maintain a warm environment for the seeds to sprout. Alternatively, find a warm spot in your house, and create a mini hothouse over your pots using an upside-down Ziploc bag secured to the pot.
It’s important to keep the soil moist during the sprouting phase and to not let it dry out. A light misting of water with a spray bottle each day or every second day will do the trick. Monitor the soil for signs of drying out and water accordingly.
Don’t be discouraged if your seeds don’t germinate within the first week. All hot chili peppers are different, and the germination process can take up to a month. Be patient and you’ll be rewarded with a successful harvest!
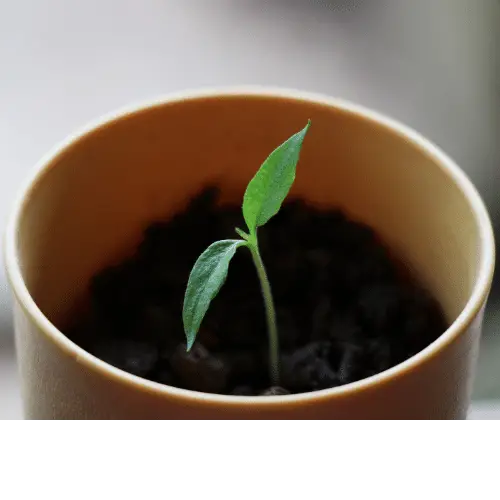
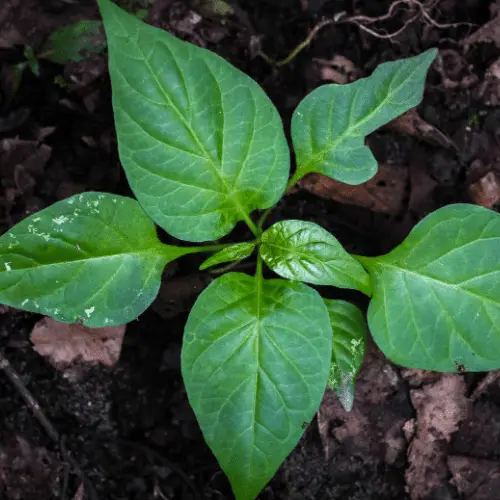
After the seeds germinate and start to grow, you could either grow them hydroponically from the cubes or plant the entire seedling cell into a larger pot. This will just depend on the size of the seedling cube you started with. Rockwool cubes can also be beneficial to the plants when planted in soil, as they help support the plant and prevent erosion from damaging it. As the roots expand and the seedling grows, you may need to transfer your chili peppers to bigger and bigger pots or containers.
Creating the right environment for your pepper plant to thrive is essential. Sunlight is a key factor, so make sure to place your tray/pot in an area that gets plenty of sunlight; at least 8 hours a day. A windowsill makes an ideal growing location as it will also prevent the seeds from rotting due to overwatering.
Airflow is another important factor. Occasionally open a window or use a fan (but don’t place it directly facing your chili plants) to circulate air.
When you are ready to move your seedlings to a bigger pot, be sure to choose one that is taller and wider than the last. It is best to grab the plants by a leaf rather than the stem, as this can damage the plant and impede growth.
To help the plants adjust to the outdoors, you can perform a process called hardening. This involves putting the pot outside for the day and bringing it in at night, repeating the routine for about a week to ten days. Once your plants are accustomed to the outdoors, they can be added to your garden, and you can look forward to harvesting some delicious hot peppers!
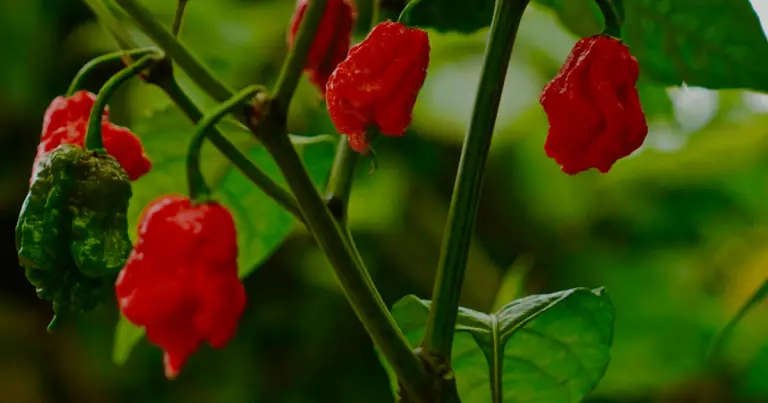
Once your peppers have started to grow, you know you’re nearly there. The amount of time it takes for peppers to mature varies, usually between 60 to 90 days, though some can take up to 150 days. The color of the pepper when it is fully ripe is determined by the type of pepper – it can be red, yellow, orange, brown, or even purple. For the best flavor and heat, let the peppers stay on the plant for as long as possible, then harvest them using scissors or pruning shears, making sure to make a clean cut to minimize damage to the plant. We always recommend wearing gloves when handling hot chili peppers.
Harvesting your own peppers opens a world of spicy possibilities. You can enjoy them fresh, dried, crushed into flakes or powder, pickled, pureed into salsa or jam, add to curries, and more. To maintain their freshness, it’s best to keep peppers in the refrigerator or freezer. If you decide to dry them, they can be stored and kept almost indefinitely. Pickling or storing them in oil can last for a few months. It’s a great way to share with family and friends and have fun growing your own hot chili peppers!
This article is a guest post written for us by Jason Marston.
Jason Marston is an avid chili grower and loves everything there is to
love about the world of hot chili peppers and spicy food. He’s the
content writer at Sonoran Spice (https://sonoranspice.com), a leading
purveyor of the world’s hottest chili peppers.
Grow Your Own Vegetable Garden is a participant in the Amazon Services LLC Associates Program, an affiliate advertising program designed to provide a means for sites to earn advertising fees by advertising and linking to Amazon.com